
Heat That Climbs 200° Every Minute
A Ruby Pro-Sear is built to get to steakhouse heat fast. From a cold start, surface temperature climbs about 200 degrees every minute until the grilling surface is at 800°F. That is not a marketing number on a box — it is the job of the Thermal Searing Grate, the burner beneath it, and the convection path inside the firebox.
Need even more heat? Light the remaining burners. For a finishing pass, swing food under the infrared burner for additional pass-over searing. The searing grate itself can be shifted to the right, left, or center of the cooking surface so the hot zone sits where you actually cook.
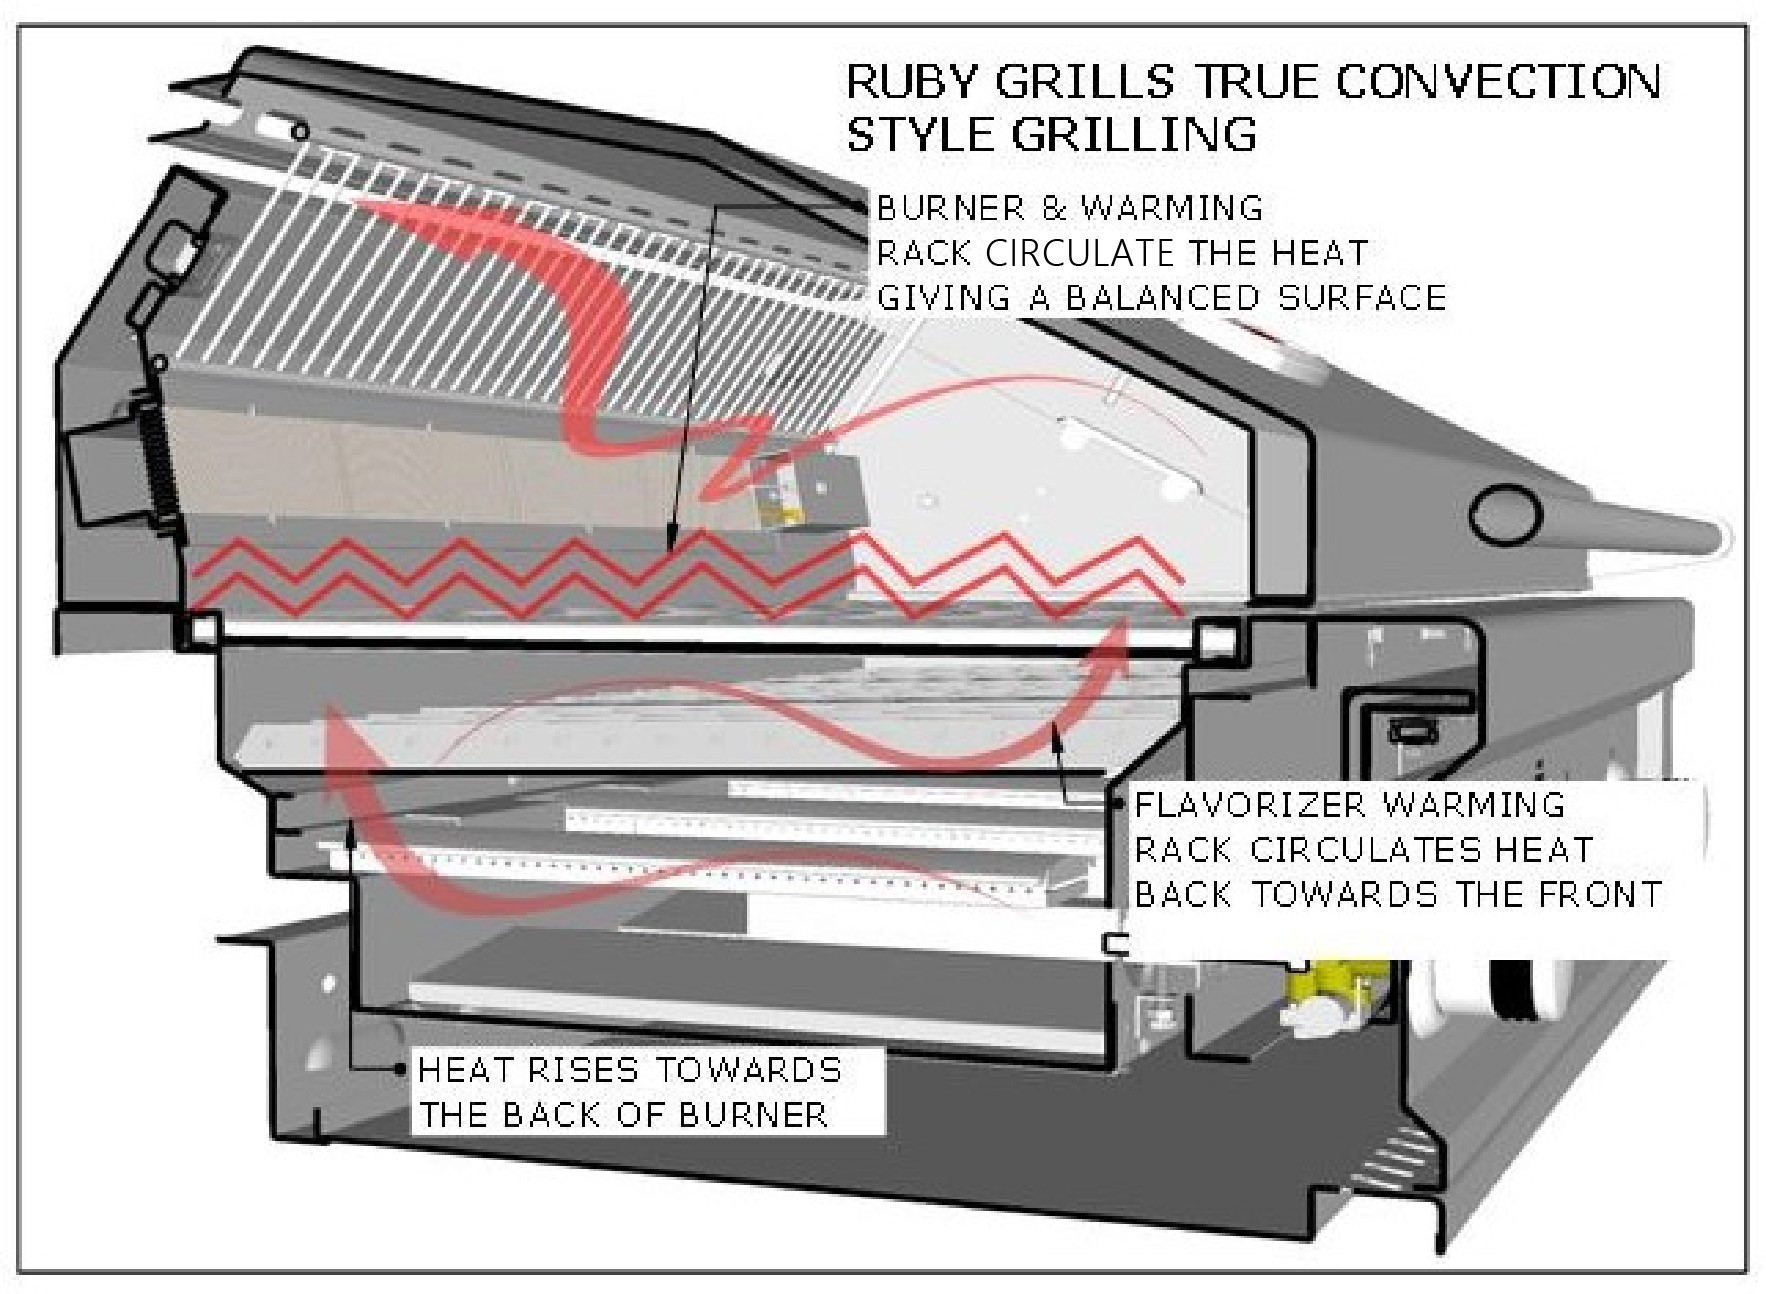
True Convection Inside the Firebox
Ruby cooking is convection, not a blast of flame against the food. Heat rises toward the back of the burner. The flavorizer warming rack then circulates that heat back toward the front of the grill. Up top, the hood burner and warming rack keep air moving so the grate runs a balanced temperature from front to rear.
- Heat rises toward the back of the burner
- The flavorizer warming rack returns heat toward the front
- The hood burner and warming rack circulate air for an even cooking surface
Close the hood and that loop gets tighter — the searing grate climbs faster and holds 800°F with less fuss.
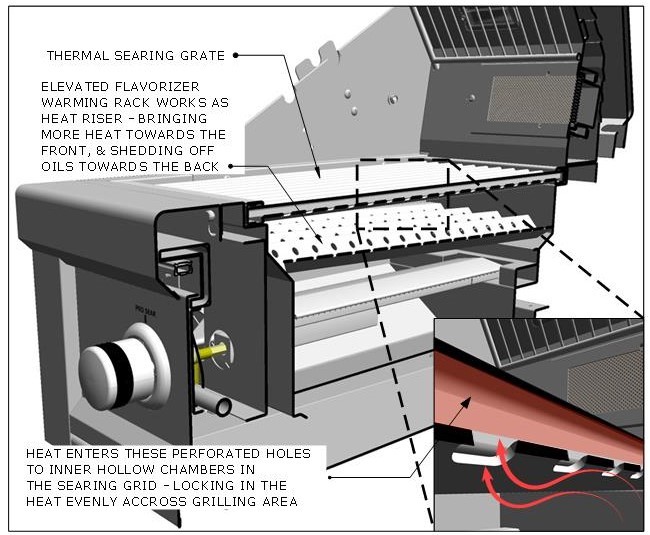
The Thermal Searing Grate — Why It Hits 800°F
Sear cooking is the default for most grilling on a Ruby. Searing locks in flavor and juices while the outer surface picks up smoke and aroma as grease and drippings vaporize on the grate. You get a crisp, flavorful crust and a tender, juicy interior.
The grate you cook on is the Thermal Searing Grate, marked as Pro Sear. The burner under that zone is matched to the others, but the valve uses a larger orifice so this zone can push past 20,000 BTU. The grate itself is welded, double-sided, 14-gauge steel with perforated holes on the underside and hollow chambers running the length of the searing surface.
Heat enters those underside holes, fills the hollow chambers, and the surface temperature jumps past 800°F in a short window. Closing the hood drives it higher. For ease of use, slide the searing location to the left, right, or center by rearranging the cooking grids.
Sear Cooking Tips
- Preheat until the searing grate is fully up to temperature before food hits the steel
- Use the Pro-Sear zone for the crust, then finish over a standard burner if you need a gentler heat
- Turn on additional burners when you want the whole box hotter, not just the sear zone
- Use the IR burner for a pass-over sear on steaks, chops, and burgers
- Move the searing grate left, right, or center so the hot zone matches how you stand at the grill
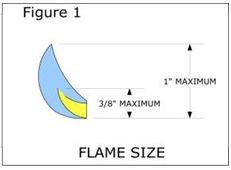
Correct Flame Color and Height
Flames should be blue and stable — no yellow tips, no roaring noise, no lifting off the burner. If you see yellow, hear excessive noise, or watch the flame lift, check that the air shutter and burner ports are not blocked by dirt, debris, or spider webs. Then adjust the air shutter.
How much air enters the burner is set by an adjustable bolt at the inlet — the air shutter. It is locked with a set screw. Loosen that screw before you light the burner for adjustment.
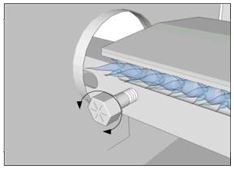
Combustion Chamber Balance — The Air Venturi
The bolt on the right side of each burner is the air venturi. It regulates how much air enters the burner for combustion. You can reach the adjustment with your hand — but only when the burner is not hot.
- Yellow flame (not enough air): turn the air venturi bolt counterclockwise to admit more air.
- Noisy flame that lifts off the burner (too much air): turn the air venturi bolt clockwise.
Target the flame in Figure 1: a tight blue inner cone no taller than 3/8 inch and an overall flame no taller than 1 inch. When that looks right, lock the set screw so the shutter cannot drift.
Put It to Work
Preheat, sear on the Pro-Sear grate, finish over a standard or IR burner, and keep the flames blue. That is the Ruby loop: convection in the box, 800°F in the grate, and a burner you can tune with a bolt.
Shop the lineup: Ruby™ Pro-Sear Gas Grills — including the 30" 3-Burner, 4-Burner, and 5-Burner models. Spec sheets and manuals live in Product Guides.